Using public key authentication for services like ssh and scp is easy.
- Generate your keys (on the client)
- Deploy the public key to the server
- Authenticate automatically
The details are tricky.
- WinSCP needs another format.
- OpenSSH format is not recognized by all tools.
- You have two keys, how do you specify which to use?
There are a bunch of commands, parameters and tools to overcome this problems and I want to explain them in this post.
After working through this tutorial it should not be a problem anymore to
- Generate a key
- Use it with services like GitHub, GitLab, Jenkins, Azure DevOps or others.
- Connect to hosts without a password.
Generate the keys
Windows now also comes with the required tools and because of this I am going to show the commands without explaining how to get the tools on older versions of windows.
The tool for the job is ssh-keygen. But wait, there are a few parameters that should be set to generate a well compatible key.
ssh-keygen -b 4096 -t rsa -N "" -f id_rsa_testThis command will generate the key pair into the “.ssh” folder inside the users home folder with the filenames set to “id_rsa_test” for the private key and “id_rsa_test.pub” for the public key. It will use the RSA algorithm with 4096 bits and will store the key without a passphrase.
If the command is used with PowerShell, the “-N” command line parameter has to be changed:
ssh-keygen -b 4096 -t rsa -N '""' -f id_rsa_testThe files are named “id_rsa_test” to prevent possible overwriting of a existing key. If there is no key present, the “-f” parameter can be omitted. In this case the keys are generated in the folder the user is in at the moment. The default folder for ssh keys is the subfolder “.ssh” in the home directory:
CMD: %UserProfile%\.ssh
Powershell: $env:USERPROFILE\.ssh
Bash: ~/.ssh
Use the keys
For public key authentication the content of the file “id_rsa_test.pub” is distributed to the services and hosts the authentication should work against. The content looks similar to this:
ssh-rsa AAAAB3 ... A1TQ== user@hostnameFor example if used to authenticate a ssh user against a Linux machine this key is inserted into the file
~/.ssh/authorized_keysof the targeted user. A connection without a password can then be made with the following command.
ssh target_user@target_hostTo use the key for GitHub authentication follow the next steps to add the public key:
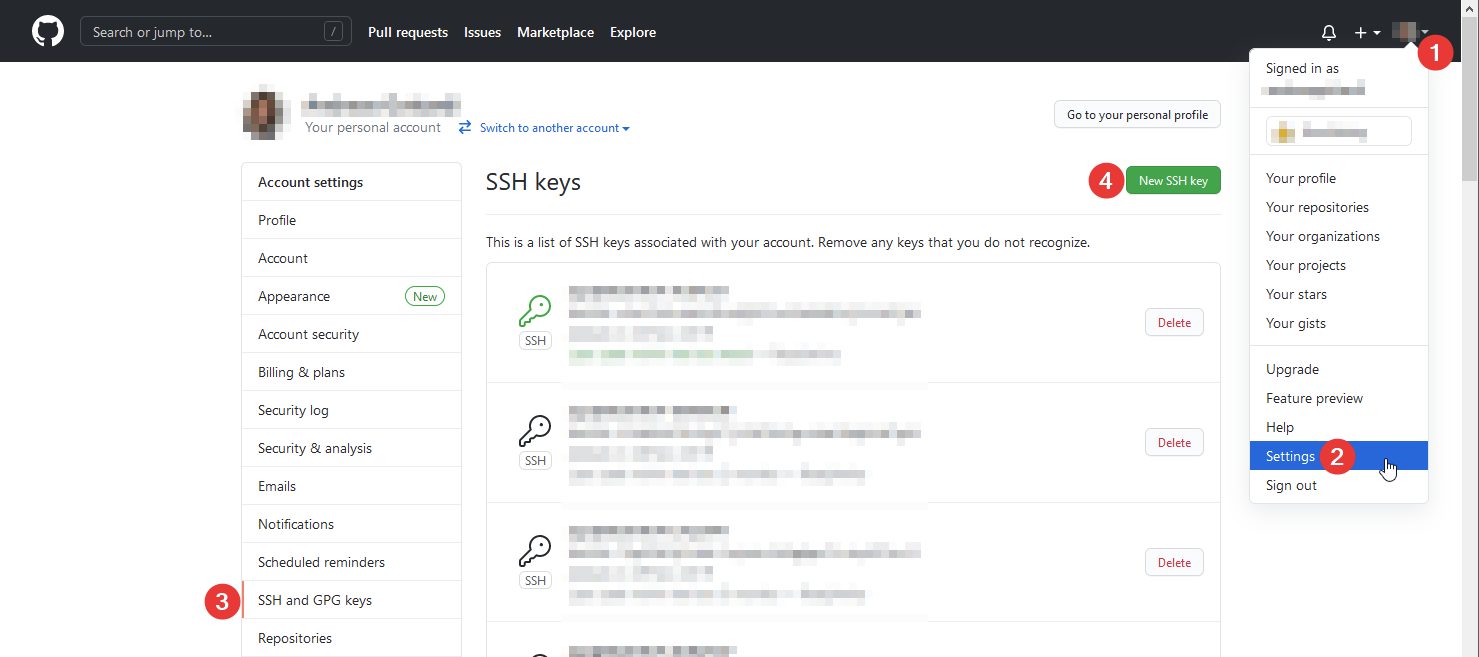
This will lead to a form where the public key can be pasted into. After saving remote repository actions can be done via ssh without entering a password.
There are plenty of other systems using public key authentication. The process of generating a key and distributing the public key to the system is always the same.
Convert different formats
It is possible, that the “ssh-keygen” command generates a key in the form
-----BEGIN OPENSSH PRIVATE KEY-----
b3BlbnNzaC1rZXktdjEAAAAABG5vbmUAAAAEbm9uZQAAAAAAAAABAAABFwAAAAdzc2gtcn
...
cDsAEG0AAknP6m2PmwAAAA9hZ29AU0VSVkVSLTAwMDcBAg==
-----END OPENSSH PRIVATE KEY-----
instead of
-----BEGIN RSA PRIVATE KEY-----
MIIEowIBAAKCAQEAw6mBu3IALusG9yM3mkhhkNle9XWDXSuPn9OD56A7/75jyvSt
...
bEQNA6lH/Mwf99lci4E0U/8L+zuB51ANpTg3eVGYauHEt4UnzDKl
-----END RSA PRIVATE KEY-----
This key can be easily converted using the following command.
ssh-keygen -m pem -f <path/to/keyfile>This replaces the OpenSSH formatted key with a RSA key.
Generate a PuTTY Private Key File
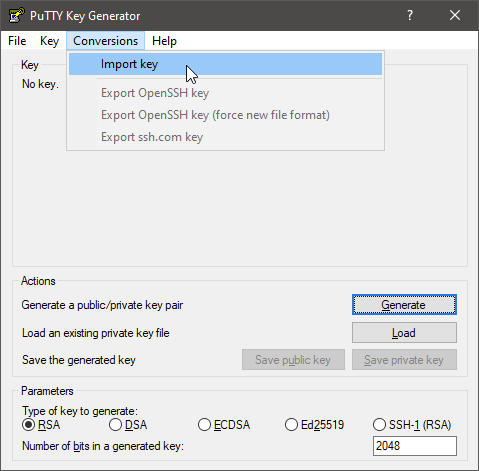
Tools like WinSCP and PuTTY require a specific key format. This can be generated using a tool called “PuTTYgen” which comes with the PuTTY installation package. Start the program and import your generated private key:
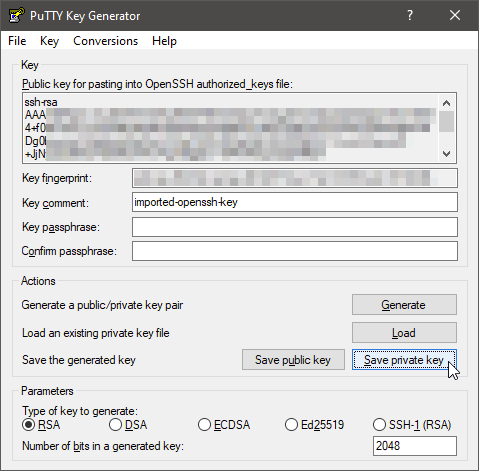
When imported select “Save private key”:
In this example no passphrase is specified. So you can confirm the next dialog with “Yes”.
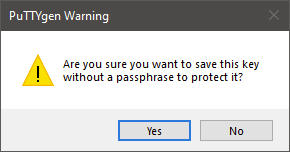
A file selection dialog will open and you can save the putty private key file. It is recommended to save it in the same folder as the existing private key.
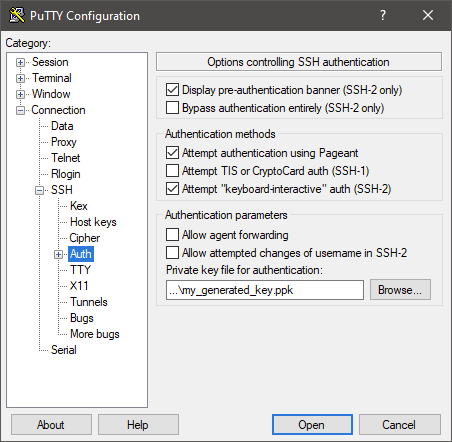
The key can be configured on a per host basis directly in PuTTY.
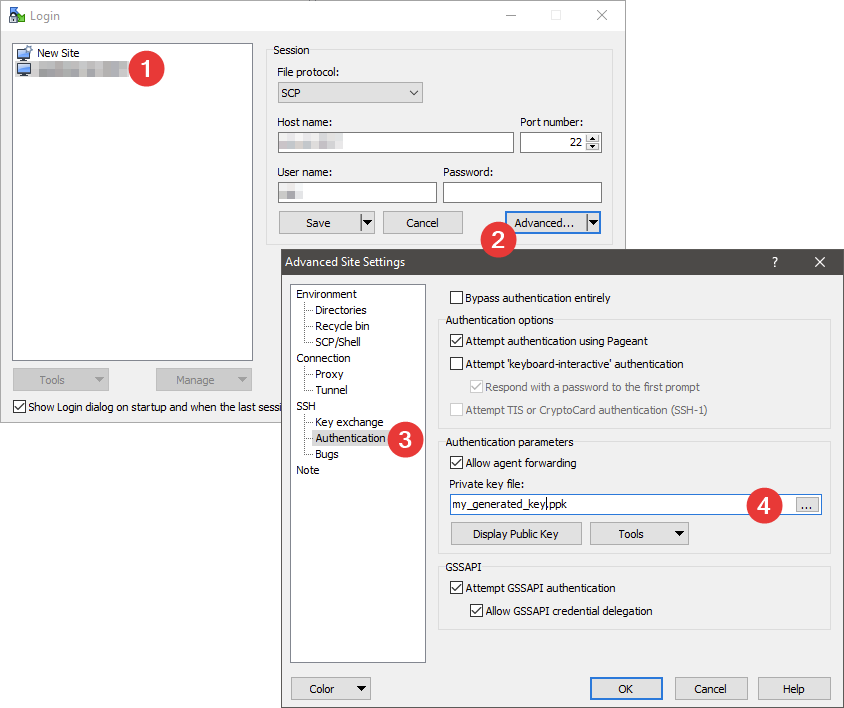
In WinSCP it is similar to the configuration in PuTTY: Select the host, click on “Edit” and “Advanced” and in the new dialog select “SSH” – “Authentication”. Select you .ppk file.
Specify key to use in ssh
This is important when there are several keys for different hosts present on one system.
ssh -i ~/path/to/private/key/file user@hostWith this command the key file to be used is specified.