Category: Software development

  • Theory vs. experience

    Question: “Do you understand?”
    Answer: “Yes!”
    Order: “Okay, then implement it.”
    Question: “How do I start?”

    And that is the difference between understanding something in theory and having experience doing it. There is a lot to it and in this article I’d like to cover this topic on the specific example of creating a repository for your work. I have done this a thousand times and I have a rough idea about naming schema, branching structure and where to put it for which case. What always annoys me is the arrogance and the view, that this is “just a simple task”. 10 different people will name the repositories in 10 different ways. The first with the dot annotation, the second one uses hyphens, the third one camel case, the forth numbers them and so on. This comes from the assumption that “I understand”. And that is just the naming.

    It doesn’t matter …

    “… it’s just a repository” is often the response when I want to discuss how to name it, what the general schema is and how to set it up correctly. The initial quote might even be correct … if … yeah, if you only have one repository, if you are working alone, if you don’t have to explain it to somebody and if you have a ton of other reasons. But how many successful developers do you know who work alone? See, a recognizable schema, names with a purpose and an easy to search through structure make life much easier. I want to give an example:

    “Go to room 80.”

    That may make sense if you have one office building with sequentially numbered rooms. But what if …

    • … the numbering starts at 1 on every floor and every floor has more than 80 rooms?
    • … there is a second office building with the same numbering schema?
    • … there are subsidiaries in other locations with the same schema?
    • … “Room 80” doesn’t refer to room 80 but to room 0 on the 8th floor?
    • … there are more than 10 floors and now you don’t know if, for example, room 180 refers to room 80 on the first or room 0 on the 18th floor.

    Context matters. People who spend a lot of time in an environment take it for granted, natural, logic and easy. But in reality, it is not. This is why it is important to talk, share information, discuss and define such things. And no, it is not just a repository. It is a system, a structure and if it is self-explanatory you need less trainings and thus less time and it is less frustrating. This all saves time and as we all know: Time is money.
  • Start Spring Boot with classpath and class

    There is an easy way to start a Spring Boot application by just calling

    java -jar MyApplication-0.0.1.jar

    This requires all dependencies to be bundled into the jar file and makes the jar file “fat”. That’s also the key word to search for when trying to create a complete jar.

    But there is another way.

    For example if I want to allow users to exchange the logging framework or allow the usage of different database drivers the dependencies can be exported into a separate directory using the following lines in the “build.gradle” build definition:

    task copyRuntimeLibs(type: Copy, group: 'build', description: 'Export dependencies.') {
    	into "build/deps"
    	from configurations.runtimeClasspath
    }

    Executing this task will copy all the runtime dependencies, like Spring Boot and transient libraries, into a folder called “build/deps”.

    I can then start my application from the project directory with the following command:

    java -cp "build/libs/*;build/deps/*" my.application.MainClass

    Hope this helps somebody.

  • Use a build agent for multiple systems

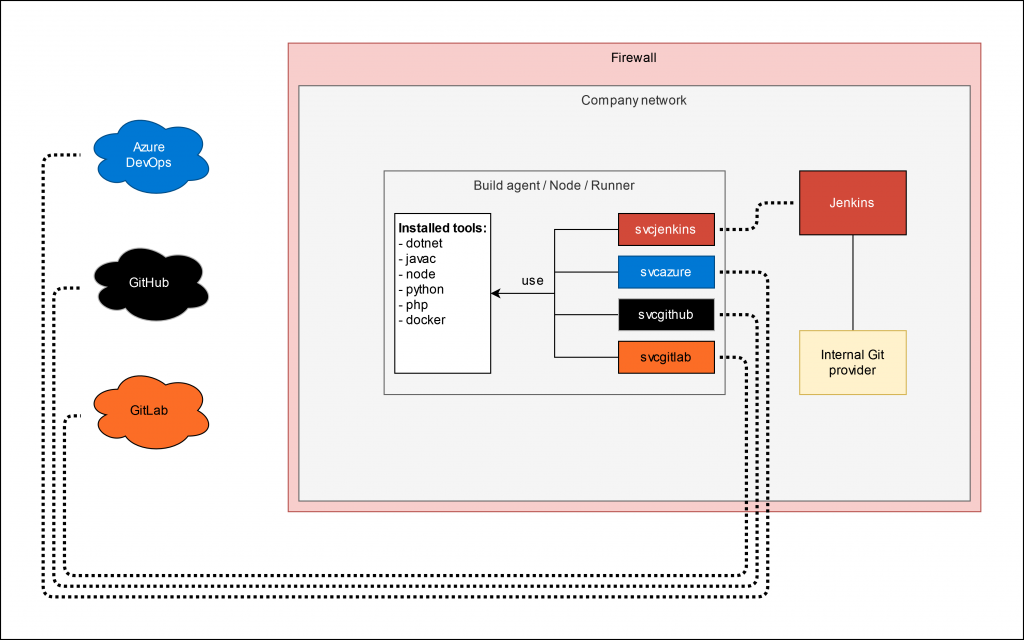
    Assume you have a build agent that has a specific tool set installed. Let’s say certain compilers, build tools and configurations. Parts of the team work with Provider A (let’s say GitHub), others with Provider B (let’s say GitLab) and a third part works with the internal Git repositories and a locally installed Jenkins instance. The whole setup is running in a company network that is secured by a firewall and looks basically like the following diagram shows.

    The basic principle here is, that the agents connect to the service and thus from the network to the cloud provider and not the other way round. This way there is no route through the firewall required and as soon as the agent is up and running it connects to the cloud provider and appears as “online”.

    Advantages

    • All tools available and maintenance is only required once.
    • Each service runs as separate user and thus access to external entities can be managed (i.e. SSH access via public key)
    • Separate workspaces and access for analysis can be granted per team
    • Can be applied to Windows and Linux build agents
    • Per provider configuration is possible on local home directory usage (local toolset)
    • Scalable: Just clone the agent, change host name and connect to providers
    • Access to internal resources is possible for publishing and deployment for example

    Disadvantages

    • Single point of failure
    • Performance can be affected when all systems run builds at the same time.

    Challenges

    • Versioning for compilers when static compilers are required in the future (i.e. for firmware compilation on specific hardware) – Can be solved with Docker.

    Conclusion

    This article only scratches the surface of the topic but it shows that it is very easy to optimize usage of existing resources by connecting different cloud providers and thus allowing teams to work in their known environments. Additionally the ops team can manage the agents and keep the tools updated.

  • Automated Eclipse downloader

    I work with Eclipse a lot and to download a new version, which comes out 4 times a year, I use the following script. It can be executed with PowerShell and does not require Java to be installed on the system because it downloads the OpenJDK version itself. Eclipse can then be found in the folder “eclipse_out” and Java in “java_out”.

    Why this script? Because it also installs all the plugins I need. For example “Spring tool suite”, “SonarLint”, “Buildship” and many more.

  • Build your application outside your IDE

    This is a short introduction into building applications like Visual Studio solutions, Gradle/Ant/Maven- or Makefile projects.

    What does building mean in general?

    Transfering your project from one state to another. This means for example one takes the source files and derives binaries from them or creating a pdf documentation from the contained markdown files. Thus build steps for a project can have a lot of functionality. Not only compiling the source code but also executing tests, packaging the software and so on.

    How do I do it?

    You run one or many applications. The following list gives a short overview over a few types and where to download them.

    • javac – compiles Java source files into Java classes.
    • dotnet – does the same for C# source files and much more. This can also build whole solutions.
    • msbuild – the older sibling of the dotnet command. Builds solution files usually generated by Visual Studio. Can be downloaded separately with the “Build Tools” package.
    • csc – The C# compiler. msbuild and dotnet include project building functionality whereas “csc” is only the command to compile C# source code files into executables.
    • gcc – Compiles C source files.
    • gradle – builds a project based on a build.gradle definition.
    • ant – builds a project based on a build.xml file.
    • maven – builds a project based on a pom.xml file.
    • make – Reads the Makefile in a directory and carries out the commands specified in it.
    • npm – handles NodeJS applications.
    • Composer – used for PHP frameworks like Symfony and Laravel.

    As you can see, there are many tools for compiling, building, packaging and executing tasks in the field of software development. What I want to say with this is:

    Each action available in an IDE (like Visual Studio, Eclipse, VSCode, Netbeans, IntelliJ, …) is normally also available on the command line and can thus be scripted and executed on a remote system by checking out the repository and executing the necessary commands in the directory.

    Why should I script it? I can just run it on my computer in the IDE.

    And you are going to ship your computer to the customer or what?

    DevOps is basically a summary of processes that handles the different stages of a project like compiling, testing, packaging, generating the documentation, deploying, archiving, etc. These process steps are defined in the project configuration files mentioned above and the tools do that for you. Based on the current setup more or less successful. If msbuild, java or gcc is not available on the system, how should project be compiled then? That’s called prerequisites and they have to be fulfilled.

    One good practice is to define a environment for the build script where the tools are defined in the variable PATH to make them generally available. Another would be to define them in the global PATH environment but then there is a chance that they might interfere with other tools on the machine. For example the ESP32 environment also uses a version of gcc but this one is not compatible with the the version that can generate 64bit Windows executables. Thus it makes sense to define the required tools only in the environment they are used in and not globally.

  • How to keep a clean local development environment

    As a developer I have to work with a lot of tools, development environments and frameworks and I want to

    • keep them in the same spot,
    • know what I work with, especially with which version,
    • keep old versions for compatibility reasons and
    • have a simple way of updating stuff without the need to change a lot of shortcuts.

    While using Visual Studio Code I found out that the tool is installed in

    %LocalAppData%\Programs\Microsoft VS Code

    when installing in user mode (without UAC permissions / as non admin). I adopted this idea for the tools I use on a daily basis:

    Now I am installing everything in the folder

    %LocalAppData%\Programs

    and add a environment variable. For example:

    Environment variables

    These are then added to the %PATH% variable to make the executables available on command line:

    This way if I have to install a new version of a application I just copy it into a new folder, change the environment variable, restart the shell and I am using the new version. Something is wrong with the new version? Just change the variable back and the old version is used. Then I can continue until a patch is available.

    The same principle can be applied to server environments. For example if a “Azure DevOps” build agent is used that is executed as specific user for this purpose. Then the tools can be installed solely for this user and the setup does not interfere with potential other services running on this machine. Same goes for shared development instances. Sure, tools used by everybody can be installed globally, but each developer has his own preferences and this setup supports this.

    I am using this principle now for

    • IDEs like Eclipse, IntelliJ and Netbeans
    • Development kits like Java, Msys2, Python and dotnet
    • Build environments like Gradle, Maven and Ant
    • Tools like Keystore Explorer, KeePass and others

    Adding the stuff to the path variable is optional of course. For example I do not want gcc available on every command line because when compiling ESP32 applications the regular gcc compiler would be the wrong one and both compilers are called “gcc.exe”. Fortunately tools like VS Code support environment variables in their configuration files:

    This would be %ProjectDir%\.vscode\c_cpp_properties.json for example:

    This way I can configure the used compiler locally for each and every project.

  • Install Visual Studio Code

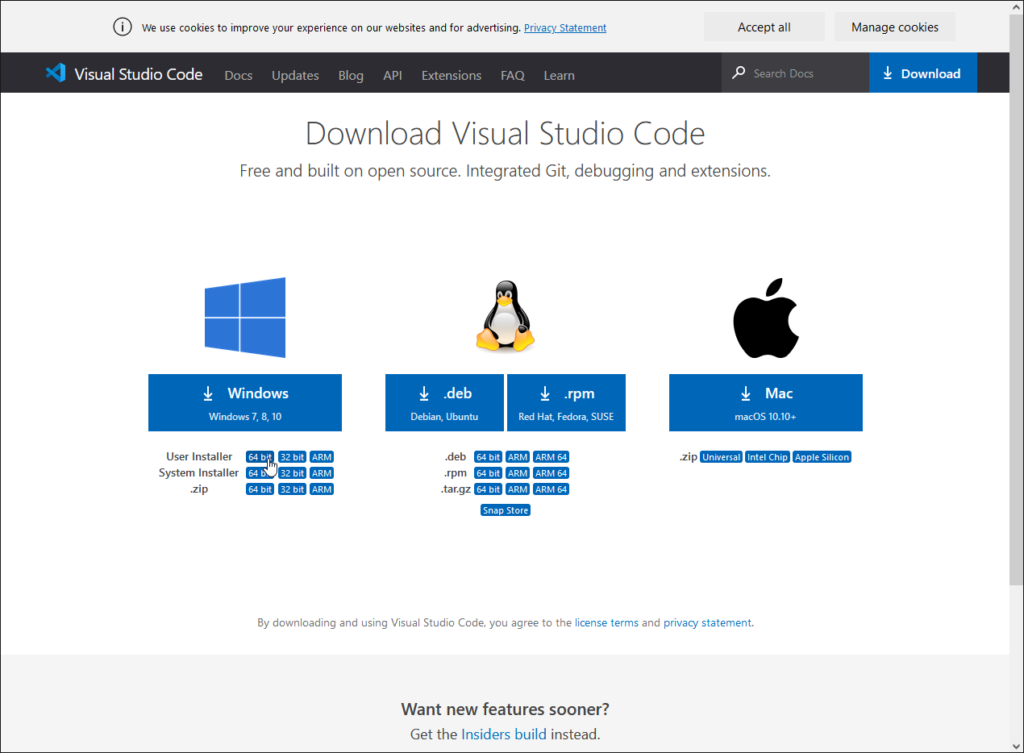
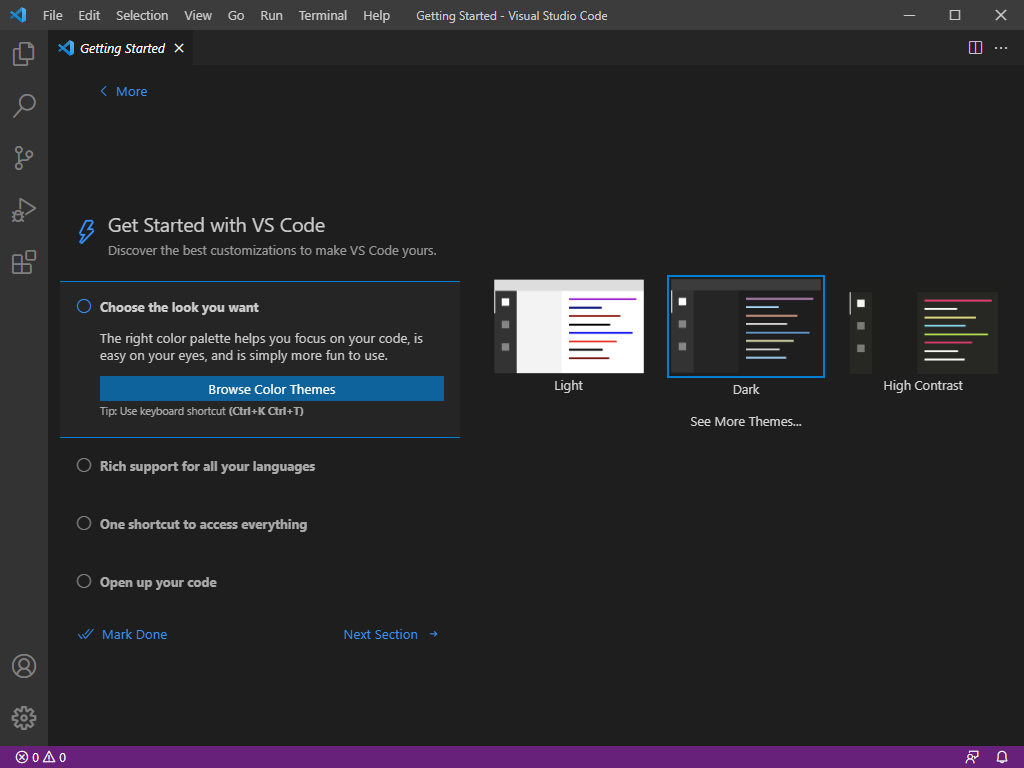
    I think it is time to show real quick how to install Visual Studio Code because most of my work is done with this editor.

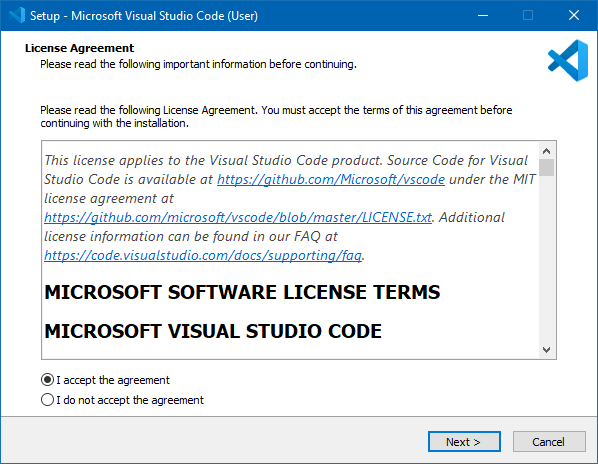
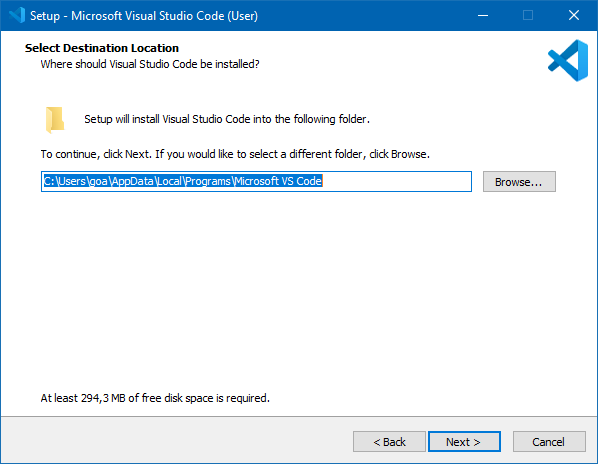
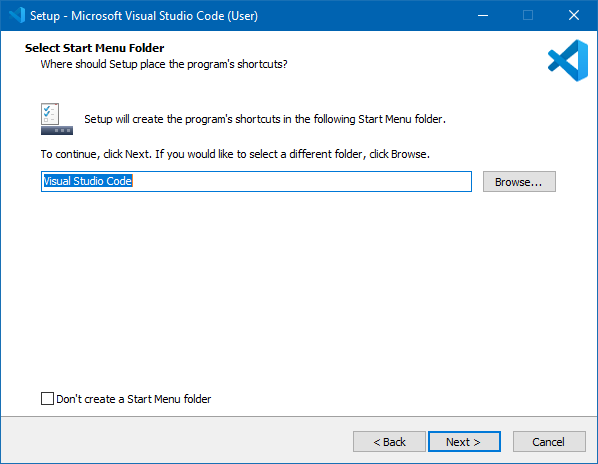
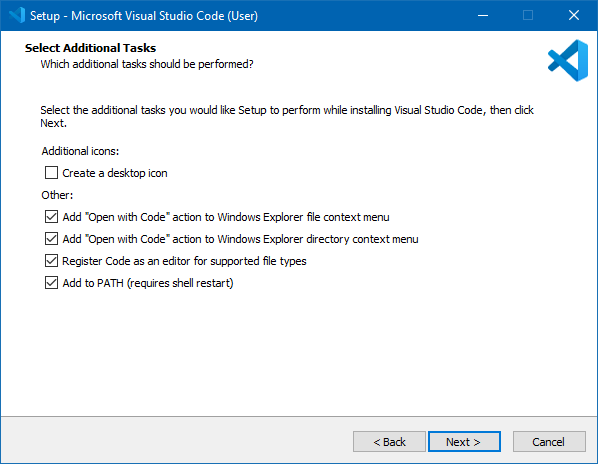
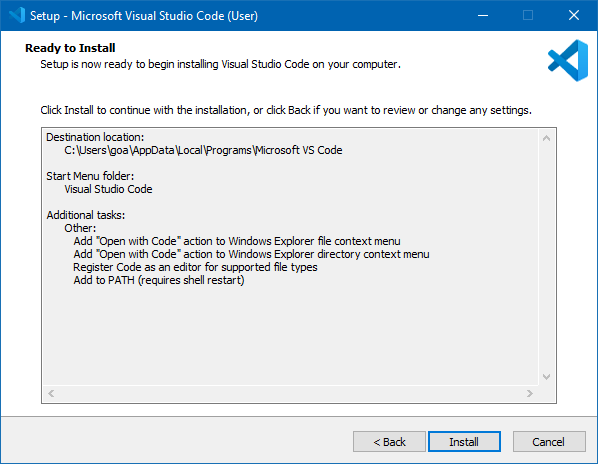
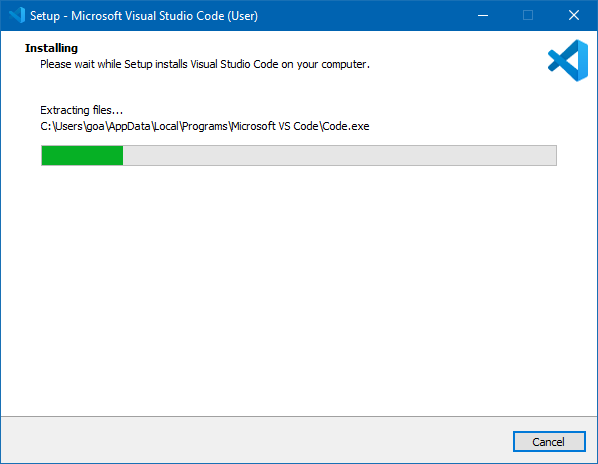
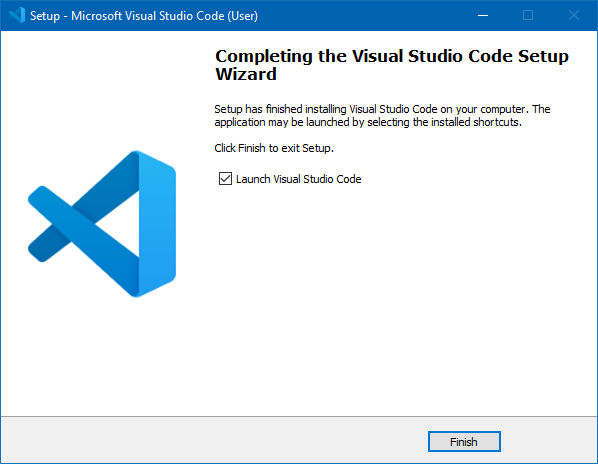
    It can be downloaded from the product page. After this is done just follow the screenshots and you are good to go. I recommend to use the user installer, which can be installed even if there are no administration rights available.

    Just start the downloaded setup and follow the steps:

    After that the program should be started.

  • Create a simple .NET core library

    In my last post I summed up my Azure DevOps setup at home. When the machine is running, the application is set up and the services are started the first tasks can be added. In this post I want to show how to create a simple solution that offers the following functionality.

    • A simple library written in C# with basic functionality that can be extended easily.
    • NUnit tests to implement test functionality. This helps improving code quality and prevents the library from getting published with errors.
    • A file with Azure DevOps definitions called “azure-pipelines.yml”. This defines what the Azure DevOps server should do.
    • A “NuGet.config” file to specify the feed the generated artifact (the .nupkg file) gets pushed to.

    This can be seen as boilerplate. As soon as the library project is set up, the builds run through and the tests are executed everything else is copy, paste and good old programming. This means: The pipeline and deployment setup is implemented with a very simple projects which reduces the possible sources of errors and it can easily be tested. As soon as this is done the real development can start with little to no errors on the DevOps side. The following script just needs .NET core installed or at least the “dotnet” executable in the PATH. It creates the the solution including a library- and a test project. Additionally a example NuGet.config and a azure-pipeline.yml definition are created.

    @echo off
    
    set SolutionName=Example.Solution
    set LibraryName=Example.Library
    set TestsName=Example.Tests
    set DevOpsUrl=https://devops.example.com
    set DevOpsSpace=MySpace
    set DevOpsProj=MyProj
    set NuGetBaseUrl=%DevOpsUrl%/%DevOpsSpace%/%DevOpsProj%
    set RepoAlias=MyRepo
    
    dotnet new sln -o %SolutionName%
    dotnet new classlib -o %SolutionName%\%LibraryName%
    dotnet new nunit -o %SolutionName%\%TestsName%
    
    dotnet sln %SolutionName%\%SolutionName%.sln^
    	add %SolutionName%\%LibraryName%\%LibraryName%.csproj
    	
    dotnet sln %SolutionName%\%SolutionName%.sln^
    	add %SolutionName%\%TestsName%\%TestsName%.csproj
    
    dotnet add %SolutionName%\%TestsName%\%TestsName%.csproj^
    	reference %SolutionName%\%LibraryName%
    
    set CLASSFILE1=%SolutionName%\%LibraryName%\Class1.cs
    
    echo using System;>%CLASSFILE1%
    echo namespace Example.Library>>%CLASSFILE1%
    echo {>>%CLASSFILE1%
    echo     public class Class1>>%CLASSFILE1%
    echo     {>>%CLASSFILE1%
    echo         public static int GetValue() { return 4711; }>>%CLASSFILE1%
    echo     }>>%CLASSFILE1%
    echo }>>%CLASSFILE1%
    
    set UNITTEST1=%SolutionName%\%TestsName%\UnitTest1.cs
    
    echo using NUnit.Framework;>%UNITTEST1%
    echo using Example.Library;>>%UNITTEST1%
    echo namespace Example.Tests>>%UNITTEST1%
    echo {>>%UNITTEST1%
    echo     public class UnitTest1>>%UNITTEST1%
    echo     {>>%UNITTEST1%
    echo         [SetUp]>>%UNITTEST1%
    echo         public void Setup()>>%UNITTEST1%
    echo         {>>%UNITTEST1%
    echo         }>>%UNITTEST1%
    echo         [Test]>>%UNITTEST1%
    echo         public void Test1()>>%UNITTEST1%
    echo         {>>%UNITTEST1%
    echo             Assert.AreEqual(4711, Class1.GetValue());>>%UNITTEST1%
    echo         }>>%UNITTEST1%
    echo     }>>%UNITTEST1%
    echo }>>%UNITTEST1%
    
    set NUGETCONFIG=%SolutionName%\NuGet.config
    
    echo ^<?xml version="1.0" encoding="utf-8"?^>>%NUGETCONFIG%
    echo ^<configuration^>>>%NUGETCONFIG%
    echo   ^<packageSources^>>>%NUGETCONFIG%
    echo     ^<clear /^>>>%NUGETCONFIG%
    echo     ^<add key="%RepoAlias%" value="%NuGetBaseUrl%/_packaging/%RepoAlias%/nuget/v3/index.json" /^>>>%NUGETCONFIG%
    echo   ^</packageSources^>>>%NUGETCONFIG%
    echo ^</configuration^>>>%NUGETCONFIG%
    
    set AZUREPIPELINE=%SolutionName%\azure-pipelines.yml
    
    echo trigger:>%AZUREPIPELINE%
    echo - master>>%AZUREPIPELINE%
    echo.>>%AZUREPIPELINE%
    echo variables:>>%AZUREPIPELINE%
    echo   Major: '1'>>%AZUREPIPELINE%
    echo   Minor: '0'>>%AZUREPIPELINE%
    echo   Patch: '0'>>%AZUREPIPELINE%
    echo   BuildConfiguration: 'Release'>>%AZUREPIPELINE%
    echo.>>%AZUREPIPELINE%
    echo pool:>>%AZUREPIPELINE%
    echo   name: 'Default'>>%AZUREPIPELINE%
    echo.>>%AZUREPIPELINE%
    echo steps:>>%AZUREPIPELINE%
    echo.>>%AZUREPIPELINE%
    echo - script: dotnet build>>%AZUREPIPELINE%
    echo   displayName: 'Build library'>>%AZUREPIPELINE%
    echo.>>%AZUREPIPELINE%
    echo - script: dotnet test>>%AZUREPIPELINE%
    echo   displayName: 'Test library'>>%AZUREPIPELINE%
    echo.>>%AZUREPIPELINE%
    echo - script: dotnet publish -c $(BuildConfiguration)>>%AZUREPIPELINE%
    echo   displayName: 'Publish library'>>%AZUREPIPELINE%
    echo.>>%AZUREPIPELINE%
    echo - script: dotnet pack -c $(buildConfiguration) -p:PackageVersion=$(Major).$(Minor).$(Patch)>>%AZUREPIPELINE%
    echo   displayName: 'Pack library'>>%AZUREPIPELINE%
    echo.>>%AZUREPIPELINE%
    echo - script: dotnet nuget push --source "%RepoAlias%" --api-key az .\%LibraryName%\bin\$(buildConfiguration)\*.nupkg --skip-duplicate>>%AZUREPIPELINE%
    echo   displayName: 'Push library'>>%AZUREPIPELINE%
    
    set TASKSJSON=%SolutionName%\%LibraryName%\.vscode\tasks.json
    mkdir %SolutionName%\%LibraryName%\.vscode
    
    echo {>>%TASKSJSON%
    echo     "version": "2.0.0",>>%TASKSJSON%
    echo     "tasks": [>>%TASKSJSON%
    echo         {>>%TASKSJSON%
    echo             "label": "build",>>%TASKSJSON%
    echo             "command": "dotnet",>>%TASKSJSON%
    echo             "type": "process",>>%TASKSJSON%
    echo             "args": [>>%TASKSJSON%
    echo                 "build",>>%TASKSJSON%
    echo                 "${workspaceFolder}/%LibraryName%/%LibraryName%.csproj",>>%TASKSJSON%
    echo                 "/property:GenerateFullPaths=true",>>%TASKSJSON%
    echo                 "/consoleloggerparameters:NoSummary">>%TASKSJSON%
    echo             ],>>%TASKSJSON%
    echo             "problemMatcher": "$msCompile">>%TASKSJSON%
    echo         }>>%TASKSJSON%
    echo     ]>>%TASKSJSON%
    echo }>>%TASKSJSON%

    In the folder containing the solution (*.sln file) the following commands can be executed and produce the corresponding output.

    dotnet build
    dotnet test
    dotnet publish
    dotnet pack

    I recommend working with Visual Studio Code. Support for .NET is great and it is highly configurable. The library project contains a folder “.vscode” with a “tasks.json” file. This file contains a single build definition. The definition object in the array “tasks” can be copied and modified to support different task types like “test”, “publish” and “pack” directly from Visual Studio Code. They can be run by pressing [Crtl]+[Shift]+[P] and selecting the following:

    A defined task can the be selected and is executed in the terminal:

    I hope this script helps to create projects. Writing the correct pipeline definitions and configs took me some time to learn. Now the projects are easily created.